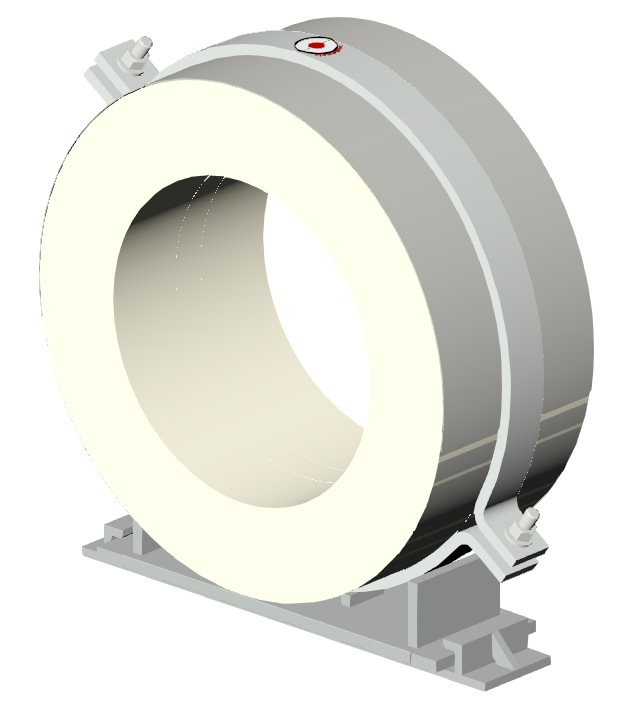

Hardware sold separately. Cross-section & dimension callouts shown in the technical data below.
Welded Tee Pipe Anchor Small Bore
C2000
Talk to a pipe support specialist about your application.
1-707-447-5014General Dimensions & Specifications
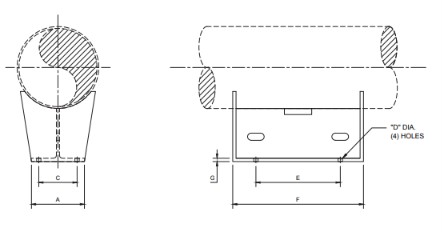
Dimensions and ratings are subject to change without notice. Contact us for current information. Available in all insulation thicknesses.
Note: For small bore welded tee anchor, see C1000. For large bore “no moment” anchor, see C2100. For insulated friction anchor, see C3000. For insulated positive anchor, see C4000.
| Pipe Size |
A | C | D | E | F | G | Insulation Thickness | ||||||
|---|---|---|---|---|---|---|---|---|---|---|---|---|---|
| 1″ | 2″ | 3″ | 4″ | 5″ | 6″ | 7″ | |||||||
| B | B | B | B | B | B | B | |||||||
| 8 | 6 | 4 | 0.69 | 9 | 12 | 0.38 | 4 | 4 | 6 | 6 | 8 | 8 | 10 |
| 10 | 6 | 4 | 0.69 | 9 | 12 | 0.38 | 4 | 4 | 6 | 6 | 8 | 8 | 10 |
| 12 | 6 | 4 | 0.81 | 9 | 12 | 0.38 | 4 | 4 | 6 | 6 | 8 | 8 | 10 |
| 14 | 6 | 4 | 0.81 | 9 | 12 | 0.38 | 4 | 4 | 6 | 6 | 8 | 8 | 10 |
| 16 | 6 | 4 | 0.81 | 9 | 12 | 0.38 | 4 | 6 | 6 | 8 | 8 | 10 | 10 |
| 18 | 9 | 6.5 | 0.94 | 15 | 18 | 0.5 | 4 | 6 | 6 | 8 | 8 | 10 | 10 |
| 20 | 9 | 6.5 | 0.94 | 15 | 18 | 0.5 | 4 | 6 | 6 | 8 | 8 | 10 | 10 |
| 24 | 9 | 6.5 | 0.94 | 15 | 18 | 0.5 | 4 | 6 | 6 | 8 | 8 | 10 | 10 |
| 30 | 12 | 9 | 1.06 | 15 | 18 | 0.5 | 4 | 6 | 6 | 8 | 8 | 10 | 10 |
| All dimensions in inches. “A” through “G” refer to the drawing above. | |||||||||||||
Application
Models C2000 and C2030 are designed for use on:
- Pipe sizes 8″ through 30″
Model Selection
C2000: Carbon Steel pipe
C2010: Chrome-Moly pipe
C2020: Carbon Silicon pipe
C2030: Stainless pipe
Features
- Supplied with bolt holes for choice of bolting or welding to support structure
- Bottom-of-pipe to top-of-steel matches base mounted insulated supports (see “B” Series)
- Broad selection of materials to match pipe material and eliminate galvanic action
- Slots in central web for insulation banding
Material Data
| C2000 | A36 Carbon Steel |
|---|---|
| C2010 | A387 Gr. 23 Chrome-Moly Steel |
| C2020 | A515 Gr. 70 Carbon Silicon Steel |
| C2030 | 304L Stainless Steel |
| Primer Coating | Primer coated or hot dipped galvanized. Other coatings available upon request. |
| Other Materials | Available upon request |
Need a formal submittal?
Formal submittal sheets are available.
Installation Guide
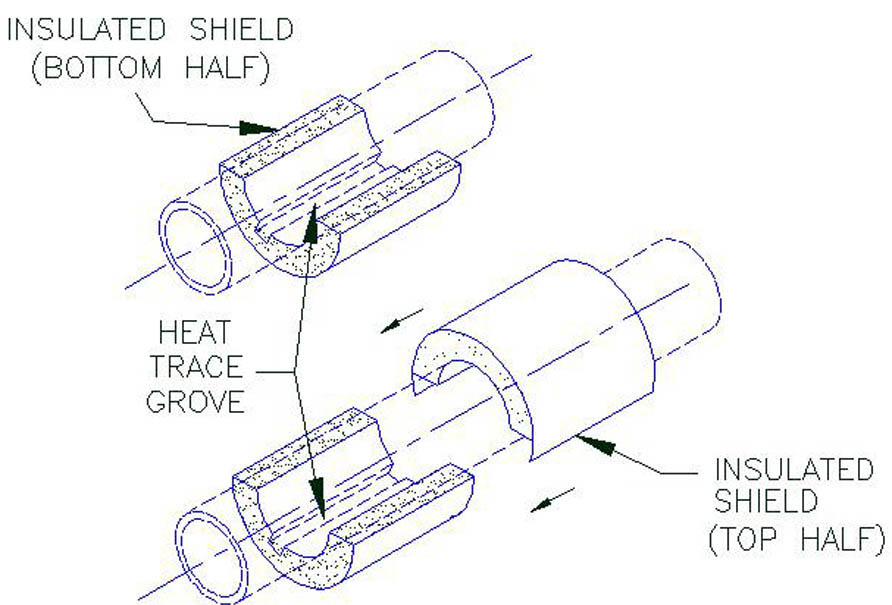
Model A1000 – A4000 & A9000
1. Position the bottom half of the insulated hanger shield (insulating structural material, sheet metal jacket and load plate where applicable) on the pipe at the applicable support location as shown.
2. Hold the top half of the shield firmly. Open the overlapping sheet metal jacket and gently slide into position the top half of the insulated shield over the bottom half shield as shown.
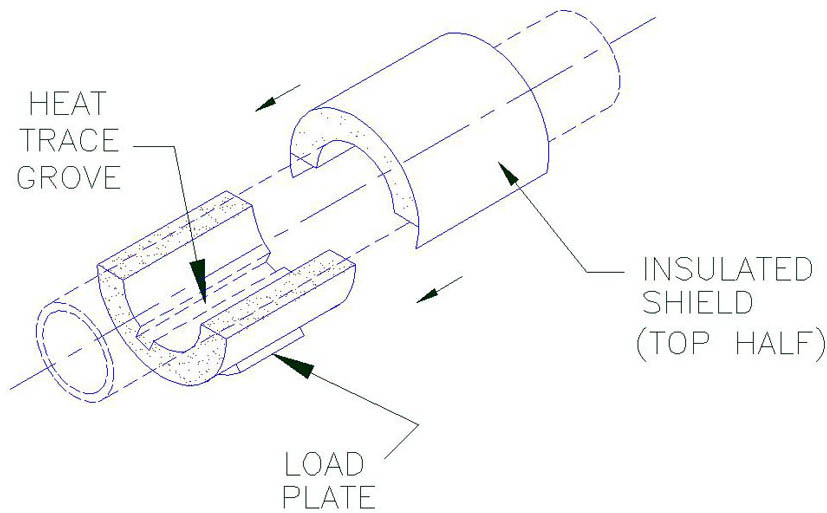
Model A5000 – A8400
1. When used on a flat surface, position shield so that it is centered on the structural steel.
2. When used with a clevis hanger, position shield symmetrically.
3. When models include heat trace groves, the number and location may vary. Check with design drawings for exact number and location. Ensure that the heat tracing cable is properly positioned inside the grove of the shield.
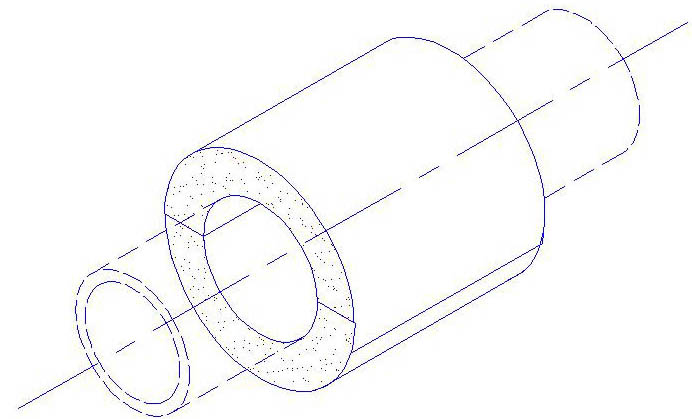
Completed Assembly Without Load Plate
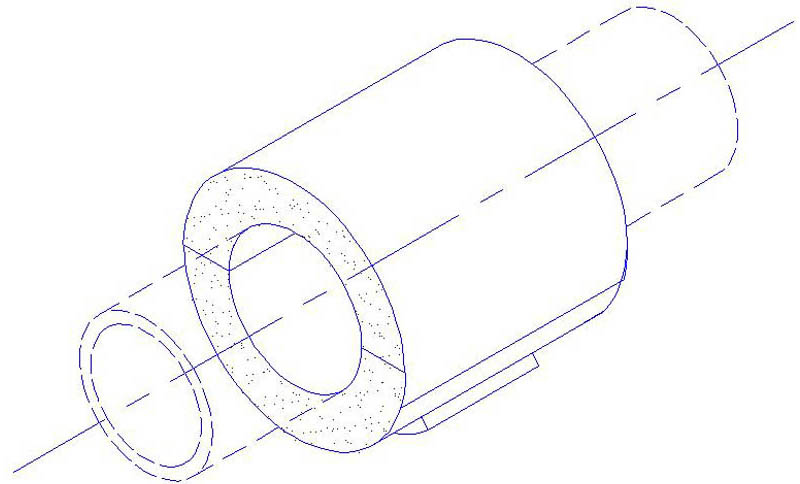
Completed Assembly With Load Plate
Downloads & resources
Custom Design Request
Need other I.D.'s, O.D.'s, temperatures or loads? Submit a custom design request.
Start Request →Revit RFA 3D Model
A1000 Insulated Pipe Support Revit RFA model for BIM & coordination workflows.
Download 3D Model →